Depending on your needs, there are a few ways to add a custom field.
Option 1: Use WooCommerce Checkout Field Editor (Official)
WooCommerce Checkout Field Editor is the official checkout field editor plugin.
When active with CheckoutWC, by default only the Additional Fields tab is available:
Simply add your fields and save.
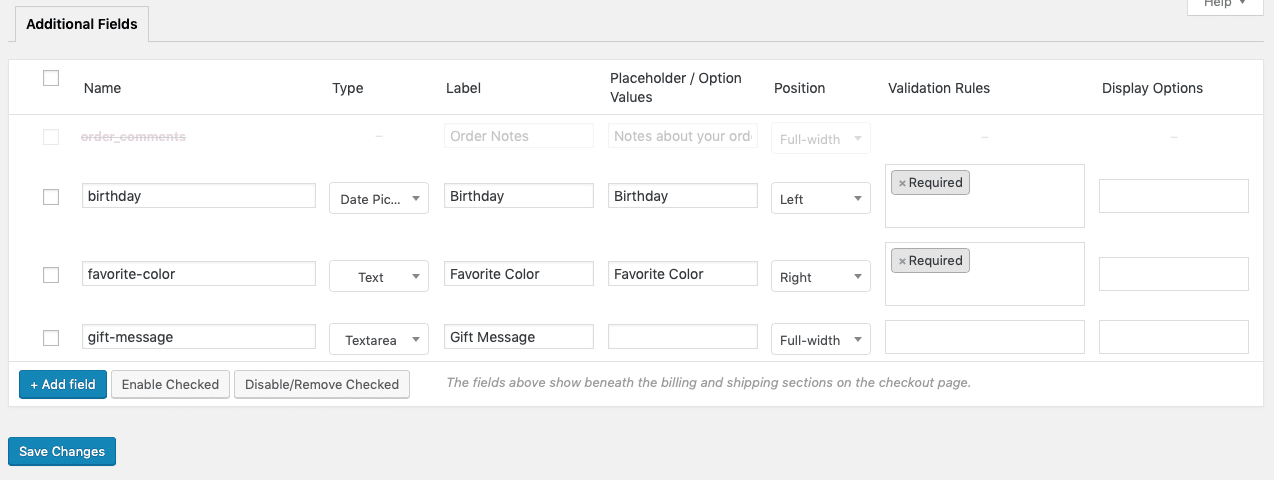
Example configuration:
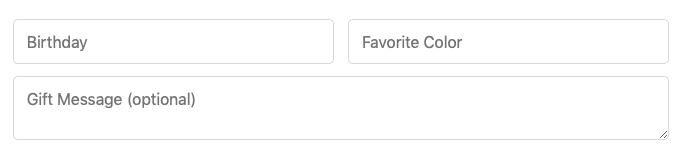
What it looks like on checkout:
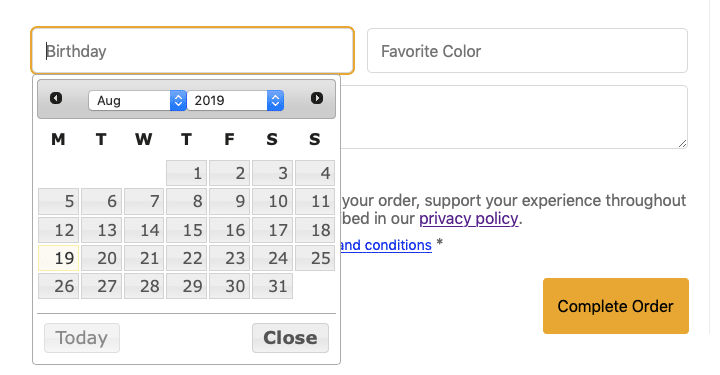
Date picker expanded:
Modifying Billing and Shipping Address Fields with Checkout Field Editor
Most stores don’t need to modify the billing and shipping address fields (and shouldn’t!)
But if you would like to use Checkout Field Editor to modify your Billing or Shipping address, here’s how you do it.
Step 1:
Go to WP Admin > CheckoutWC > Integrations and check the box next to “Enable Checkout Field Editor address field overrides.”
Step 2:
Modify your addresses under WooCommerce > Checkout Fields.
Step 3:
If you are adding a new field to the billing address, you need to add the same field to the shipping address so that the value will be saved to the billing address when the customer selects “Same as shipping address”.
To ensure your fields work properly with this functionality, do the following:
- Prefix your shipping address fields with shipping_ or billing_. Example: billing_fax
- Use the same name for fields that should be synced when ‘Same as shipping address’ is checked. If you add shipping_fax, make sure you name your billing field billing_fax.
Option 2: Use ThemeHigh Checkout Field Editor
Tired of reading? Here’s a video:
ThemeHigh has a free version of their plugin and a pro version.
To layout the checkout fields the way you want, you will want to first set them in the order you desire and then apply a class to each field to set the width. Here are the valid classes with the widths:
- form-row-wide (100%)
- form-row-first (50%)
- form-row-last (50%)
- col-lg-3(3/12 / 25%)
- col-lg-4(4/12 / 33%)
- col-lg-6 (6/12 / 50%)
- col-lg-8 (8/12 / 66%)
- col-lg-9 (9/12 / 75%)
Many people opt to use the Pro version of their plugin because it provides conditional fields.
Just like with the official Checkout Field Editor, you’ll need to tell CheckoutWC to allow ThemeHigh to change your address fields here: WP Admin > CheckoutWC > Integrations
ThemeHigh will enable select2 (selectWoo) on select fields by default. To prevent this behavior, add this class to each select field: cfw-no-select2
Option 3: Manually add a custom field to your functions.php file.
Here’s a snippet demonstrating how to add a greeting card field:
Here’s how to add a signature required checkbox:
Here’s an example of a required checkbox:
Option 4: Use Checkout Add-ons
Checkout Add-ons can also be used for custom fields. These work best if you intend to charge extra for certain options. You can use it without charging, however, each field will show up with a $0.00 price line in the totals area.
You will need a license for Checkout Add-ons, which you can get here:
https://woocommerce.com/products/woocommerce-checkout-add-ons/
Then just follow their guide to add a custom field:
https://docs.woocommerce.com/document/woocommerce-checkout-add-ons/
Option 5: Other plugins
There are other plugins that work with CheckoutWC. We have added partial support for Cashier.